You can build workflows that retrieve the list of available Azure subscriptions and iterate over them. Here’s how to proceed.Documentation Index
Fetch the complete documentation index at: https://docs.openops.com/llms.txt
Use this file to discover all available pages before exploring further.
1. Create an Azure connection that enables access to multiple subscriptions
First, create an Azure connection if you don’t already have one. Unlike AWS connections, OpenOps doesn’t provide a built-in way to grant access to multiple Azure subscriptions from connection settings. Instead, you can use a single Azure service principal (application) to access multiple subscriptions by assigning it roles in each of them. To do this:- In your Azure Active Directory tenant, create an app registration and a corresponding service principal.
- Generate a client secret for the service principal. Use the service principal’s Application (client) ID, Client secret, and Directory (tenant) ID to create an OpenOps connection.
- In the Azure Portal or CLI, assign the same service principal appropriate RBAC roles (for example, Reader or Contributor) in each subscription you want OpenOps to access.
2. Get the list of subscriptions
In your workflow, add an Azure CLI action. In the action’s properties, select the connection that enables access to multiple subscriptions. Select any subscription in the Subscriptions dropdown. In the Command field, enter the following: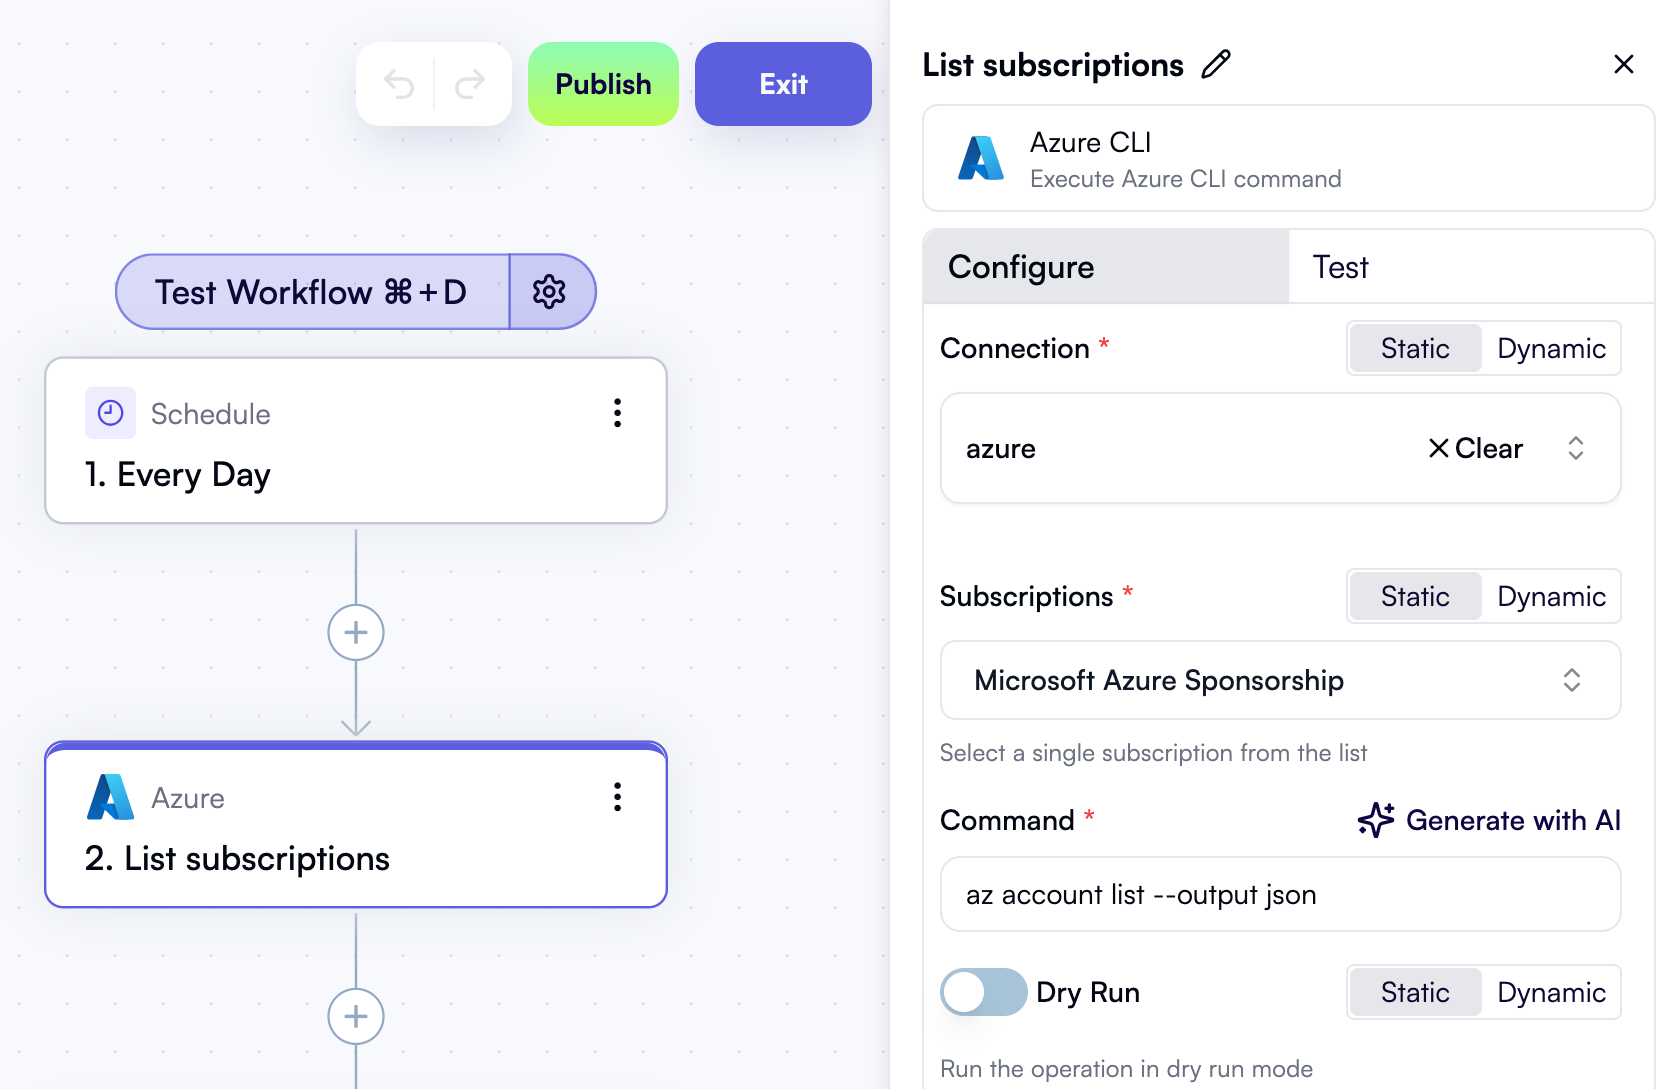
3. Iterate over subscriptions
Add a Loop on Items step to your workflow. In the Items property, use the Data Selector view to select the entire output of the previous step:
4. Add an Azure step inside the loop and inject the subscription ID into the command
Inside the loop, add an Azure action that you want to perform for each subscription — for example, another Azure CLI action. In the action’s properties, select the connection that enables access to multiple subscriptions. Select any subscription in the Subscriptions dropdown. In the Command field, enter the command you want to run. For example, to list active VMs in each subscription, enter:--subscription= flag. Use Data Selector to expand Loop on Items, then item, and click Insert next to the id property:
The resulting command in the properties pane will look like this, dynamically inserting the current subscription ID into the command template:
