- Sort and filter your data: for example, only show opportunities that are not completed or dismissed.
- Group your data: for example, show opportunities by owner.
- Import and export data from/to CSV, JSON, or XML.
- Link to other tables, much like relational databases.
- Map cloud resources to owners based on tags and business units. This is an essential stage for workflows that include human-in-the-loop steps. For every resource that provides cost-saving opportunities requiring human intervention, the workflow needs a way to determine who to send an approval request to.
- Log opportunities and anomalies in a central location, with options to approve, dismiss, mark as false positive, or snooze.
- Compile a list of unused or idle resources to delete.
- Generate spend reports broken down by business unit, owner, or cloud service.
Preconfigured tables
OpenOps comes with multiple workflow templates, and many of them use tables to perform one or more of the tasks outlined above. All tables used in the templates come preconfigured in your workflow installation: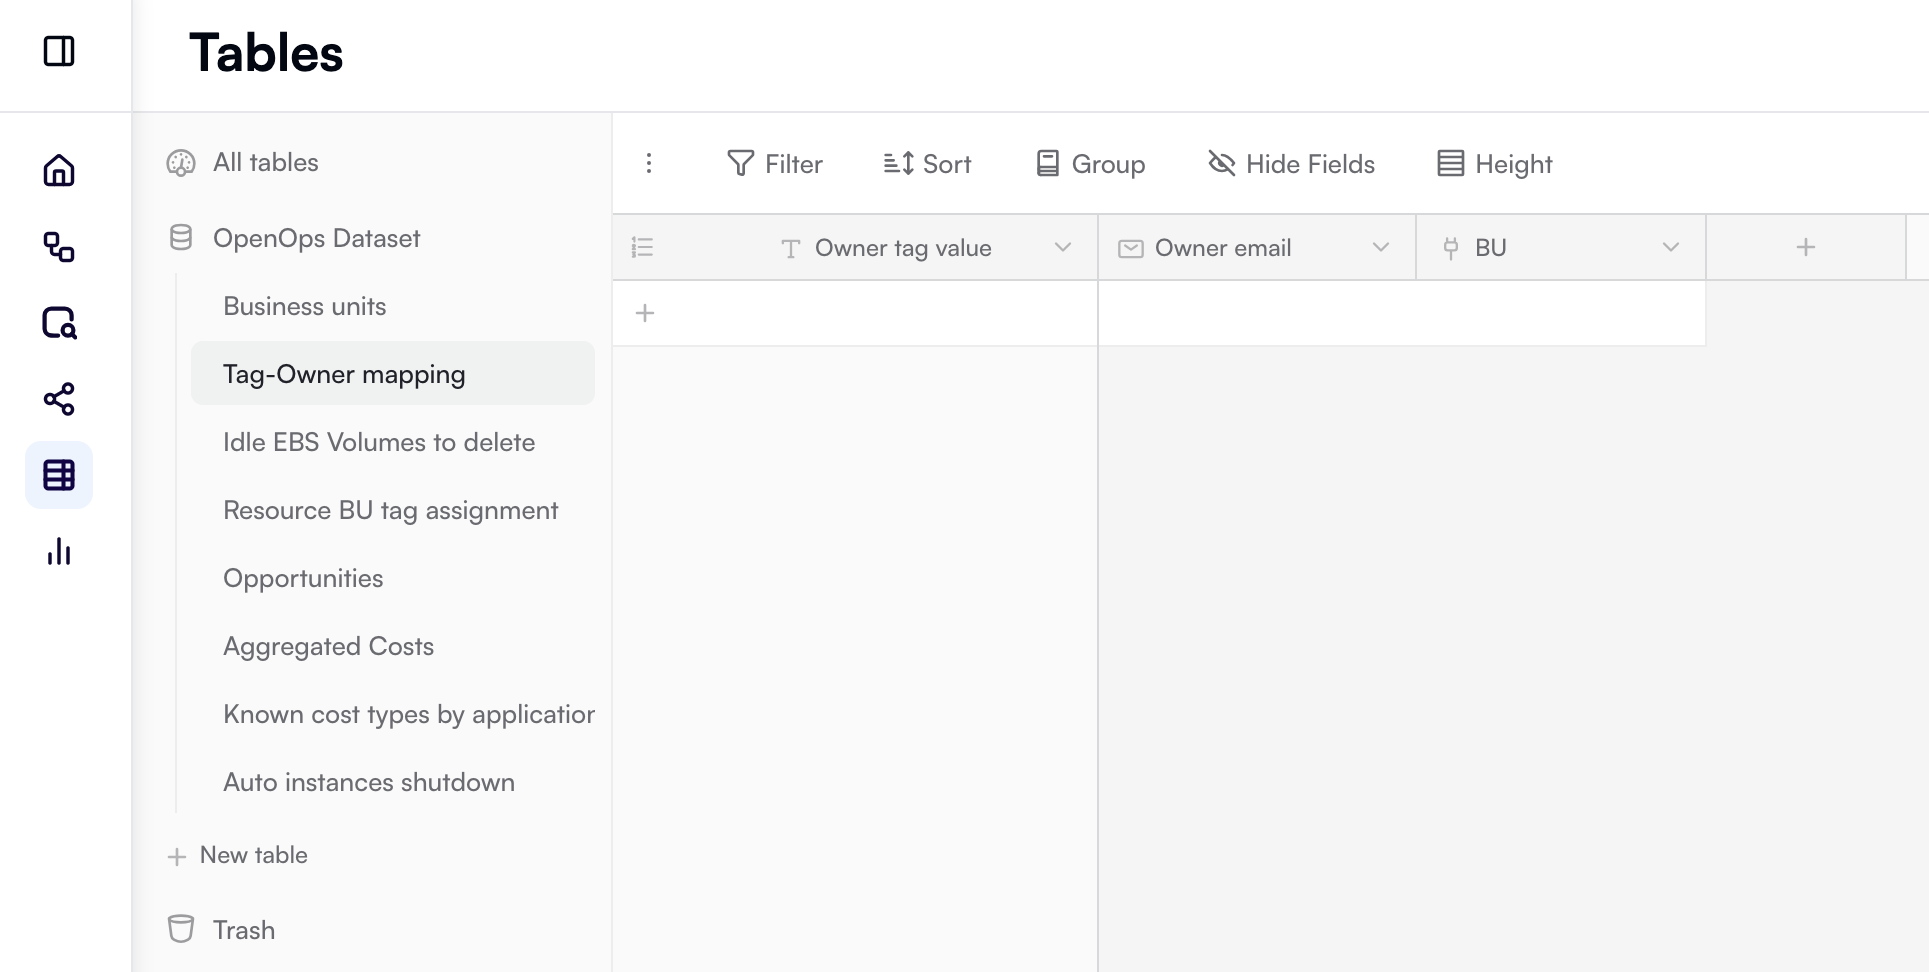
Opportunities
The preconfigured Opportunities table is used in multiple workflow templates to track realized and unrealized savings and to provide visibility into why savings have not yet been achieved. By default, this table has 20 fields (columns): ID, Status, Owner, Estimated savings USD per month, Snoozed until, Workflow, Resource ID, Follow-up task, Account, Region, Service, Opportunity source, External opportunity ID, Opportunity type, Resolution notes, Opportunity details, Complexity, Risk, Creation time, and Last modified time. Here’s a sample of the Opportunities table in an active OpenOps installation: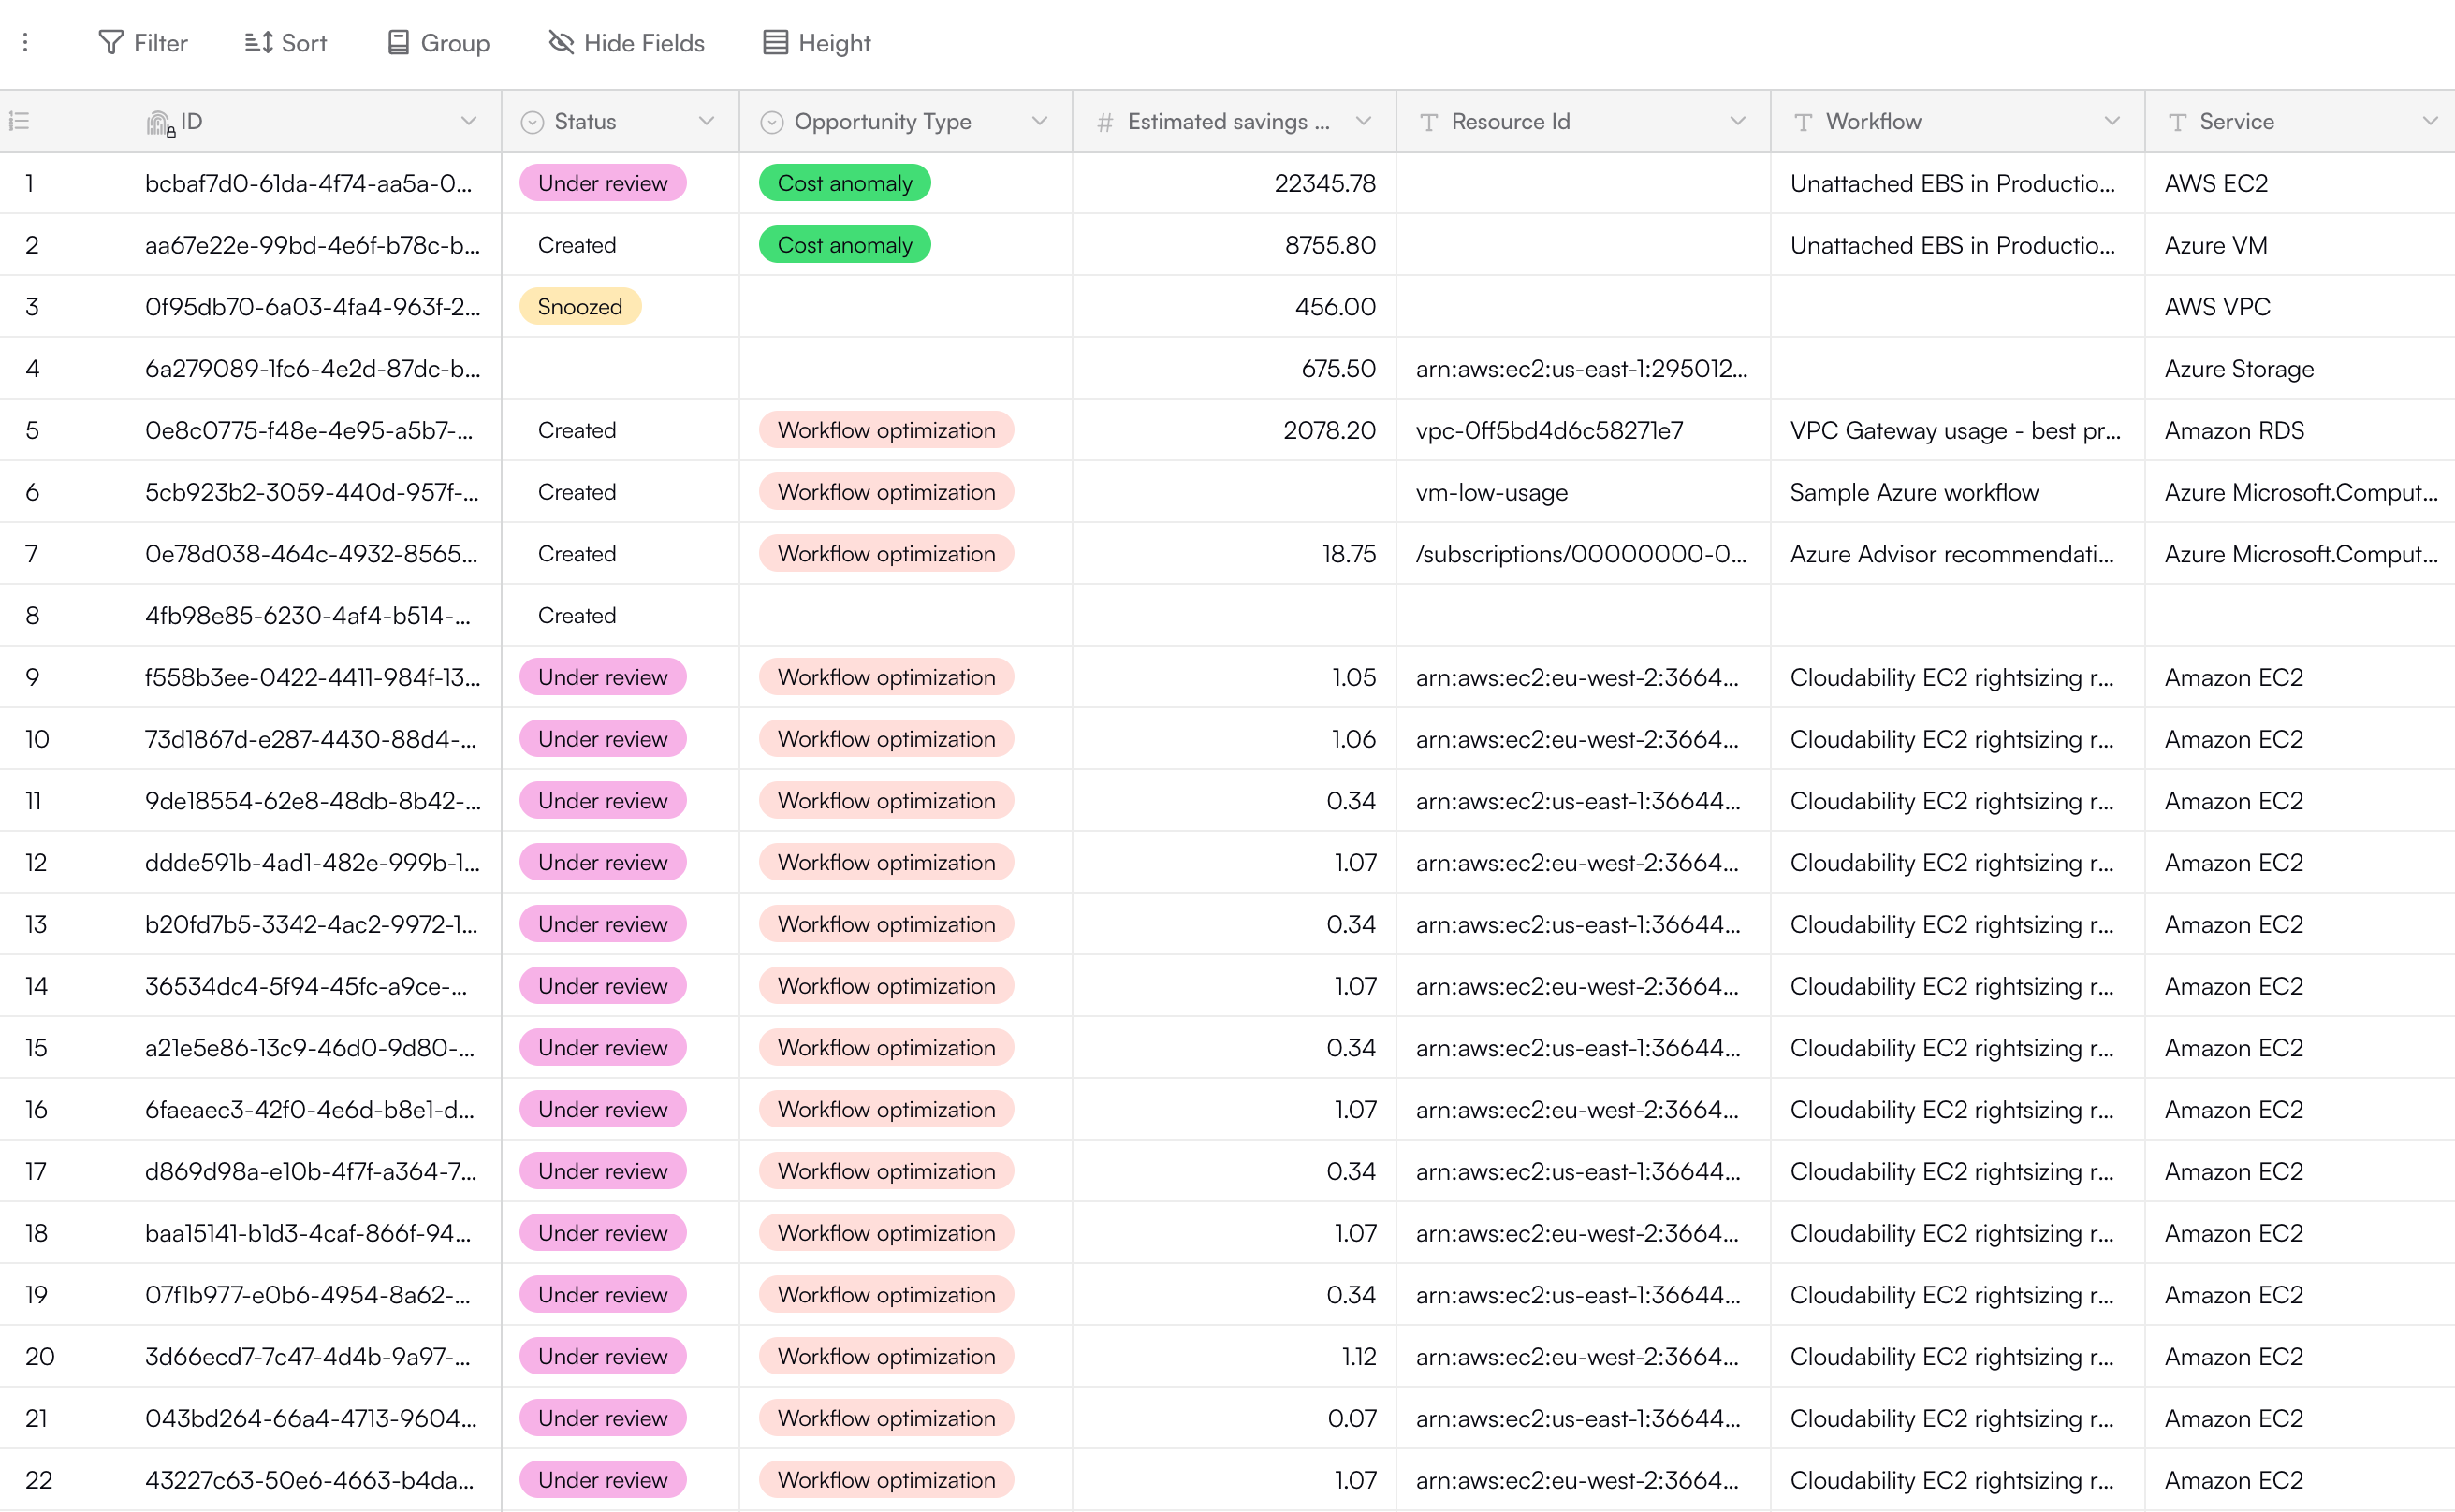
Tag-owner mapping
The preconfigured Tag-owner mapping table is used in workflow templates to retrieve emails of resource owners based on values of resource tags whose labels are specified in the workflow. This table has three fields: Owner tag value, Owner email, and BU. The latter connects it to another preconfigured table, Business units, which stores more details about each business unit.Example of usage in a workflow template
To better understand how the two tables described above are used in real-life workflows, here’s what the Idle RDS Instances in Staging, Terraform Remediation workflow template does with them:- For each AWS Compute Optimizer recommendation for idle RDS, it finds the value of the
unittag and maps that tag to an email using the Tag-owner mapping table. - It logs opportunity details to the Opportunities table with the following fields:
- Status is set to Created, as this is a new opportunity.
- Estimated savings USD per month is set to the estimate provided by AWS Compute Optimizer.
- Once the owner receives a Slack message suggesting deletion of the resource, the Status field in the Opportunities table is updated with one of three values:
- Under review if the owner approved deletion and the workflow has created a GitHub PR.
- Dismissed if the owner has chosen to dismiss the opportunity.
- Snoozed if the owner has chosen to consider the opportunity later. The number of days to delay is reflected in the Snoozed until field.
Creating new tables
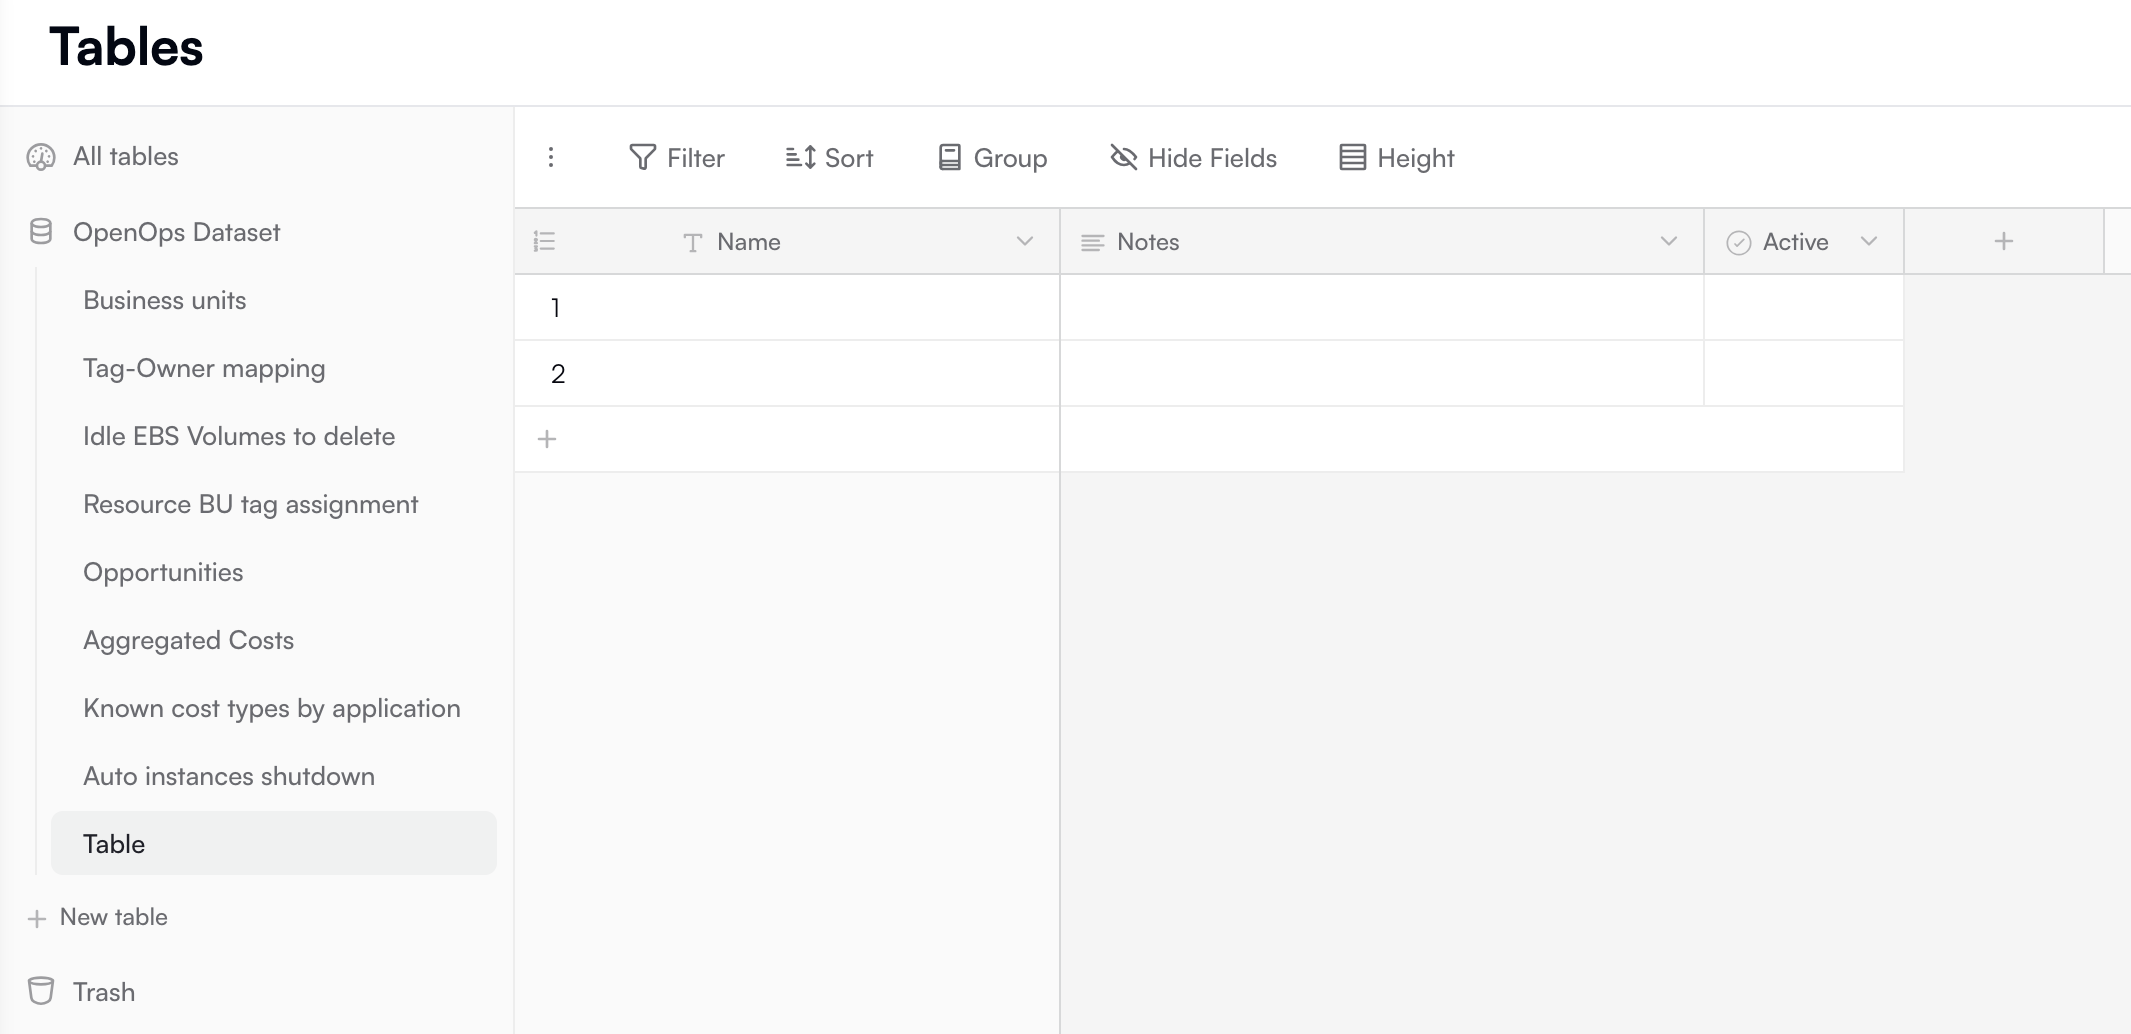
In addition to preconfigured tables, you can create your own. This is especially useful when you’re developing original workflows that are not based on OpenOps templates and you want to set up a visual way to save data generated by the workflows. To create a new table from scratch:- Go to the Tables tab. In the tree view on the left, click + New table under the list of currently available tables in the OpenOps Table dataset:
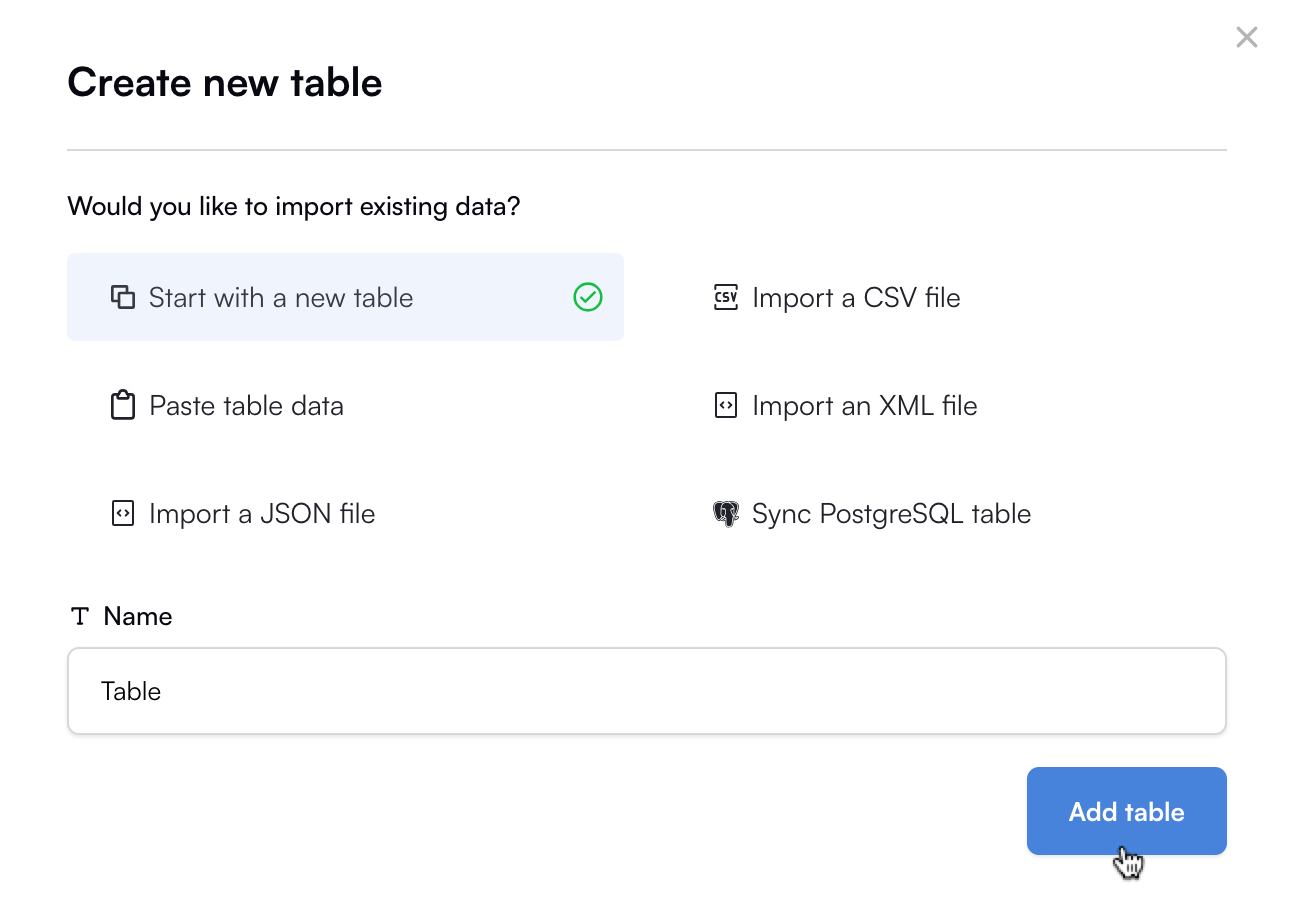
- In the Create new table popup, keep Start with a new table selected and click Add table:
Creating and updating rows in tables
In some scenarios, you create rows in OpenOps tables but never need to update or delete them. In these cases, the order and type of fields in your table don’t really matter. More often, however, you want to update table rows at some point after initially creating them. In this case, you need to carefully choose the type of the row identifier field. The row identifier field is the first field in the table. It is used to find the specific row to update and therefore must contain unique values. For example, in the built-in Opportunities table, the row identifier field is ID and has a UUID type, which guarantees that the values in this field are unique.Setting up the row identifier field in a new table
When you create a new table, the default row identifier field, Name, has the type Single line text, which does not guarantee uniqueness of values. Here’s how you can modify the row identifier field to ensure unique values:- Click the arrow to the right of the field name in the table header and select Edit field:
- In the Edit field popup, change the field type to UUID:
- Change the name of the field to ID or Identifier to reflect the field’s new function.
- Click Save.
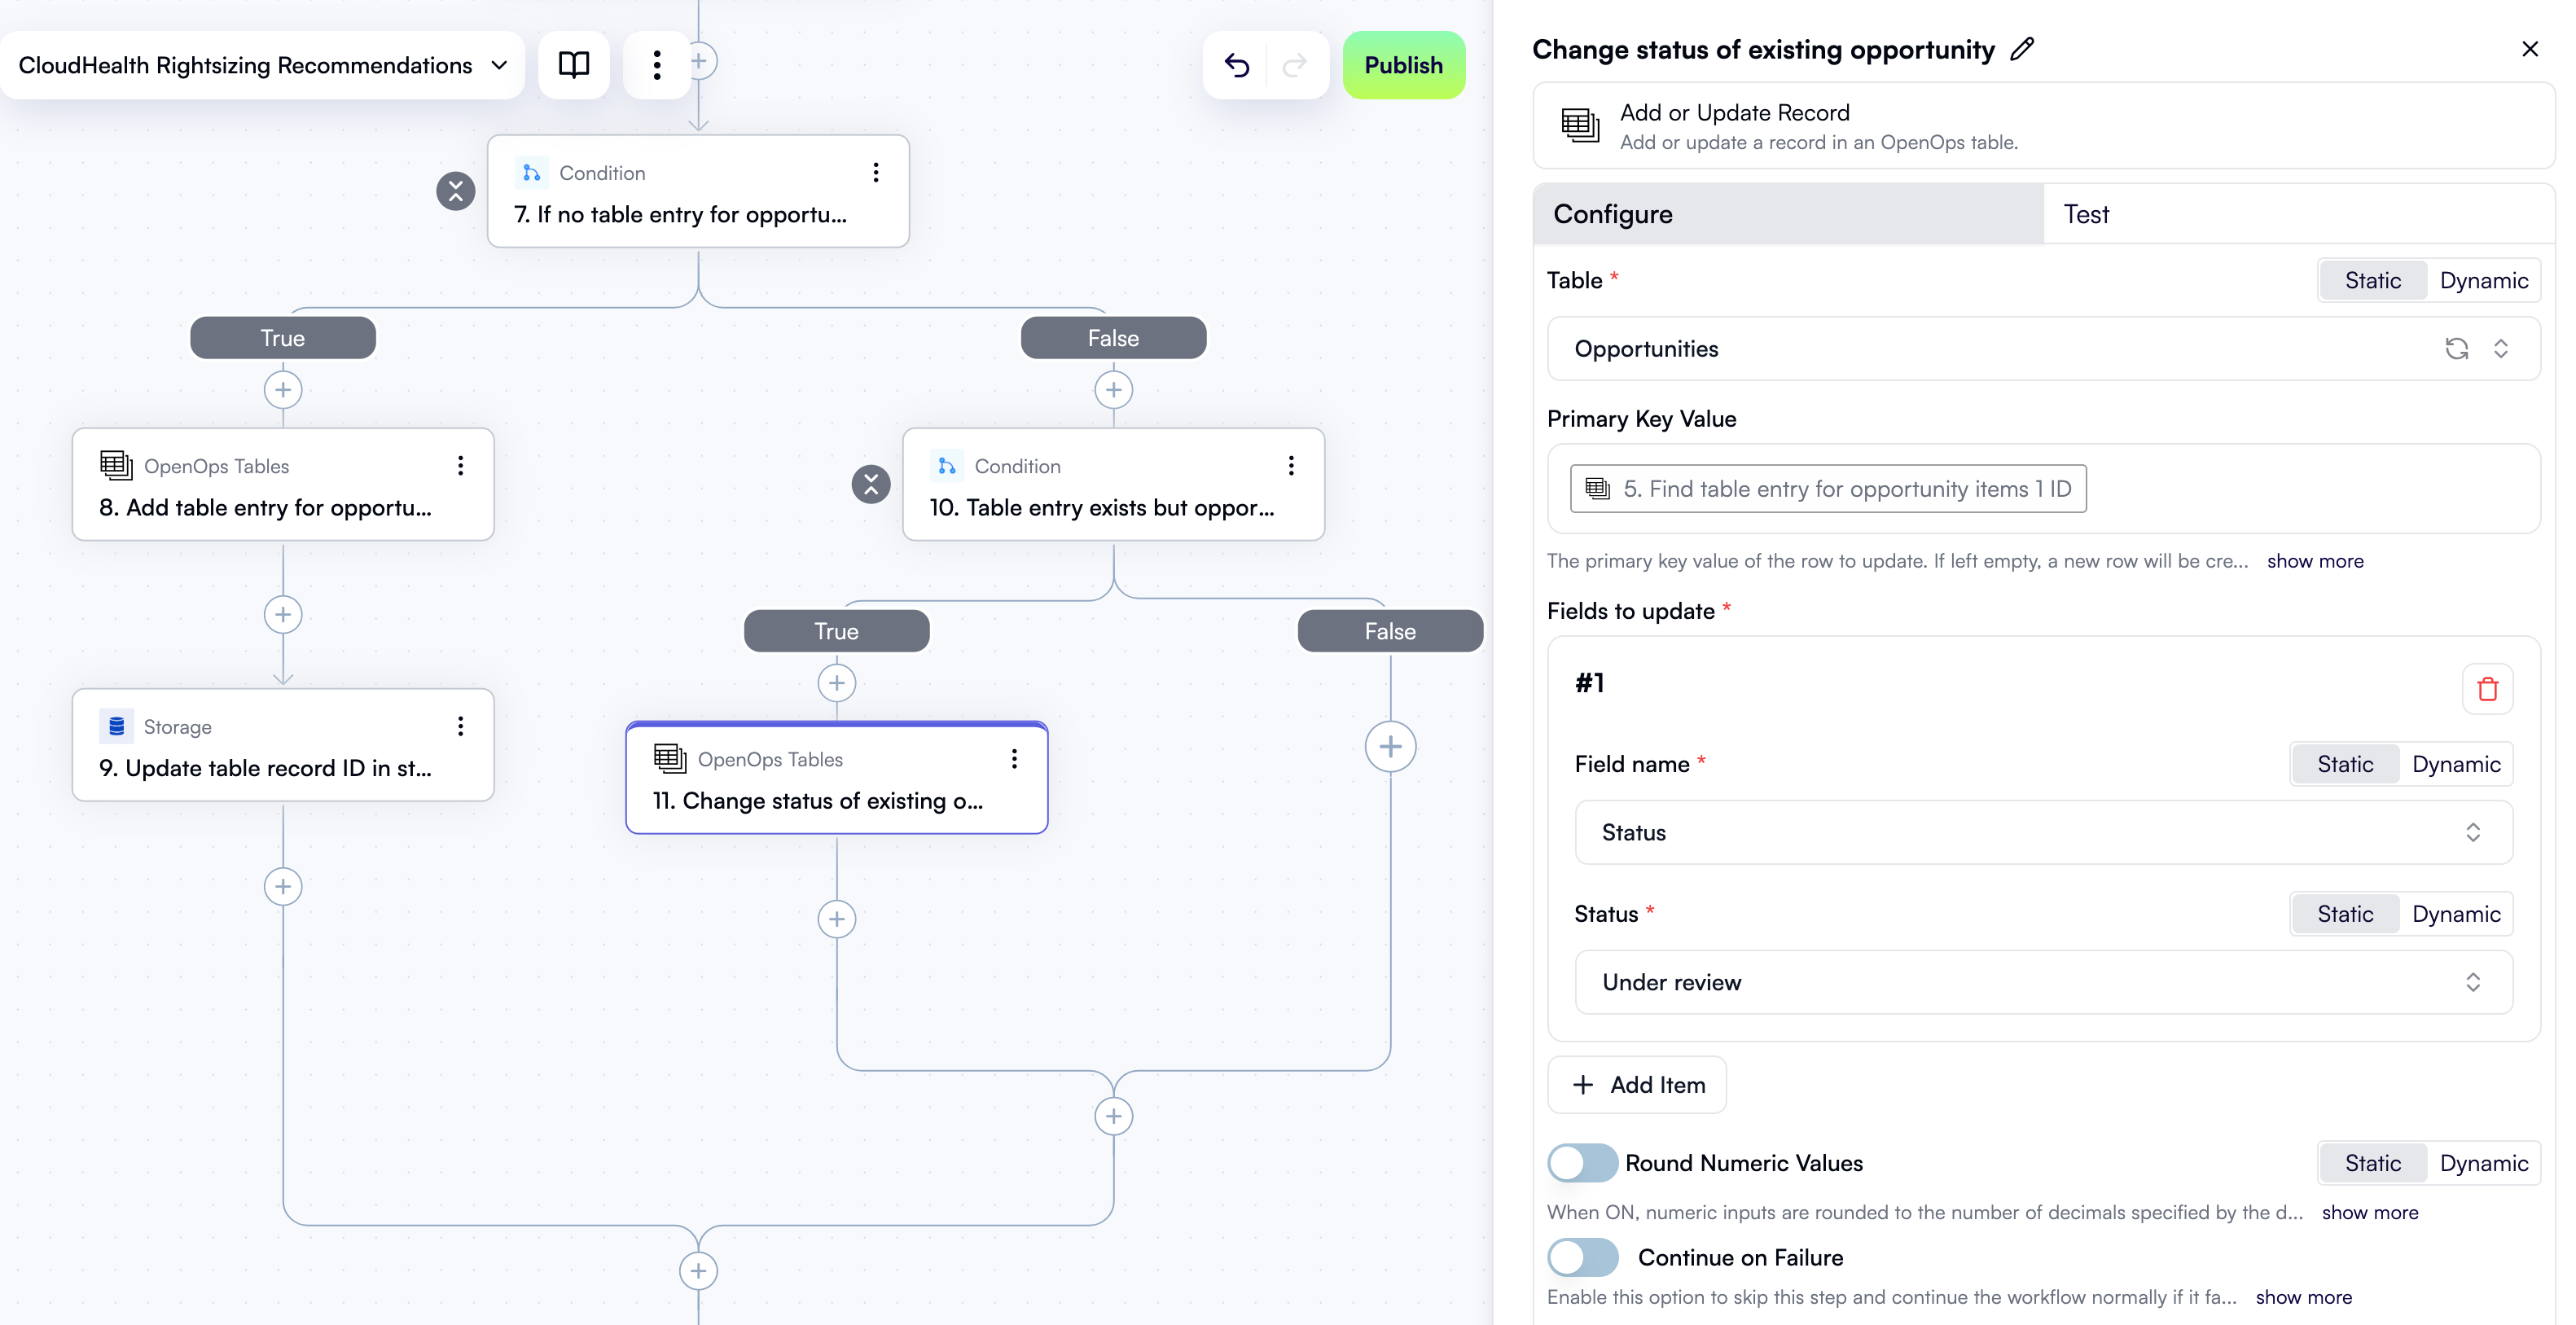
Using the row identifier field in workflows
When building your workflows, you can use four table actions in your workflow steps: Two of these actions may require a unique row identifier: Add or Update Record and Delete Record. When you use the Add or Update Record action, its properties pane contains a field called Primary Key Value, which is the row identifier. If you leave it empty, the action will create a new row in your table. If you want to update an existing row, you need to provide a value for the Primary Key Value field. Often, a workflow contains a step that creates a new row in a table and then another step that updates the same row. In this case, you can use the output of the first step as the input for the second step. To do this, click Primary Key Value in the action properties of the second step to show the Data Selector view, then expand the output of the first step that created the row, and select the row identifier field: