Scaffold a new block
To get started, generate a new block by running the following command:Block name: entermy-unique-block: a name that uniquely identifies your block in the OpenOps repository.Package name: optionally, enter a name for the npm package associated with your block. If left blank, the default name will be used:@openops/block-<block-name>.Authentication type: selectNonefor now, as this minimal block will work with a publicly available API. Other options areSecret (API key),Custom (custom properties), andOAuth2 (OAuth2 flow).Create opinionated folder structure with stubs for actions, tests, and common service layer: selectYes - Create full folder structure with stubs.
packages/blocks/<your-block-name>/. The scaffolded files are as follows:
- Source and tests:
src/index.ts: the main entry point of your block, where you’ll define its metadata (name, display name, description) and register actions.test/index.test.ts: a starter Jest test file where you can add unit tests for your block.
- Project metadata:
package.json: declares the block as an npm package.project.json: configuration for the Nx build system that OpenOps uses.README.md: a starter readme file describing what the block does and how to use it.
- Tooling and quality:
.eslintrc.json: ESLint rules for enforcing code style and catching errors.jest.config.ts: configuration for Jest, the test runner used by OpenOps.
- TypeScript setup:
tsconfig.json: base TypeScript configuration for the block.tsconfig.lib.json: TypeScript settings for the block’s source code.tsconfig.spec.json: TypeScript settings for the block’s tests.tsconfig.base.json(in the repo root): serves as a central list of all TypeScript settings, and the CLI updates it to include your new block.
src/index.ts file should contain the following code:
Create an action
Now let’s create the first action, which will make a simple GET request to httpbin.org.Enter the block folder name: enter the folder of the block you’ve just created:my-unique-block.Enter the action display name: enter the name of the action that users see in the OpenOps UI. This is also used as the base for the name of the file for the action. For this exercise, enterMy first action.Enter the action description: this should be a brief but informative text in the UI, explaining the action’s function and purpose. For this exercise, it’s OK to enterWhat this action does.Does this action modify data or state (e.g., create, update, delete)?: enternfor “No”.
My first action, the CLI will create a new file named my-first-action.ts in the packages/blocks/<your-block-name>/src/lib/actions directory. The file should look like this:
- The
createActionfunction takes an object with several properties, including thename,displayName,description,props, andrunfunction of the action. - The
propsproperty is an object that defines the properties the action needs the user to configure. In this case, the action doesn’t require any properties. - The
run()function is called when the action is executed. It takes a single argument,context, which contains the values of the action’s properties. In this case, the action doesn’t have any properties, so thecontextparameter remains unused. - The
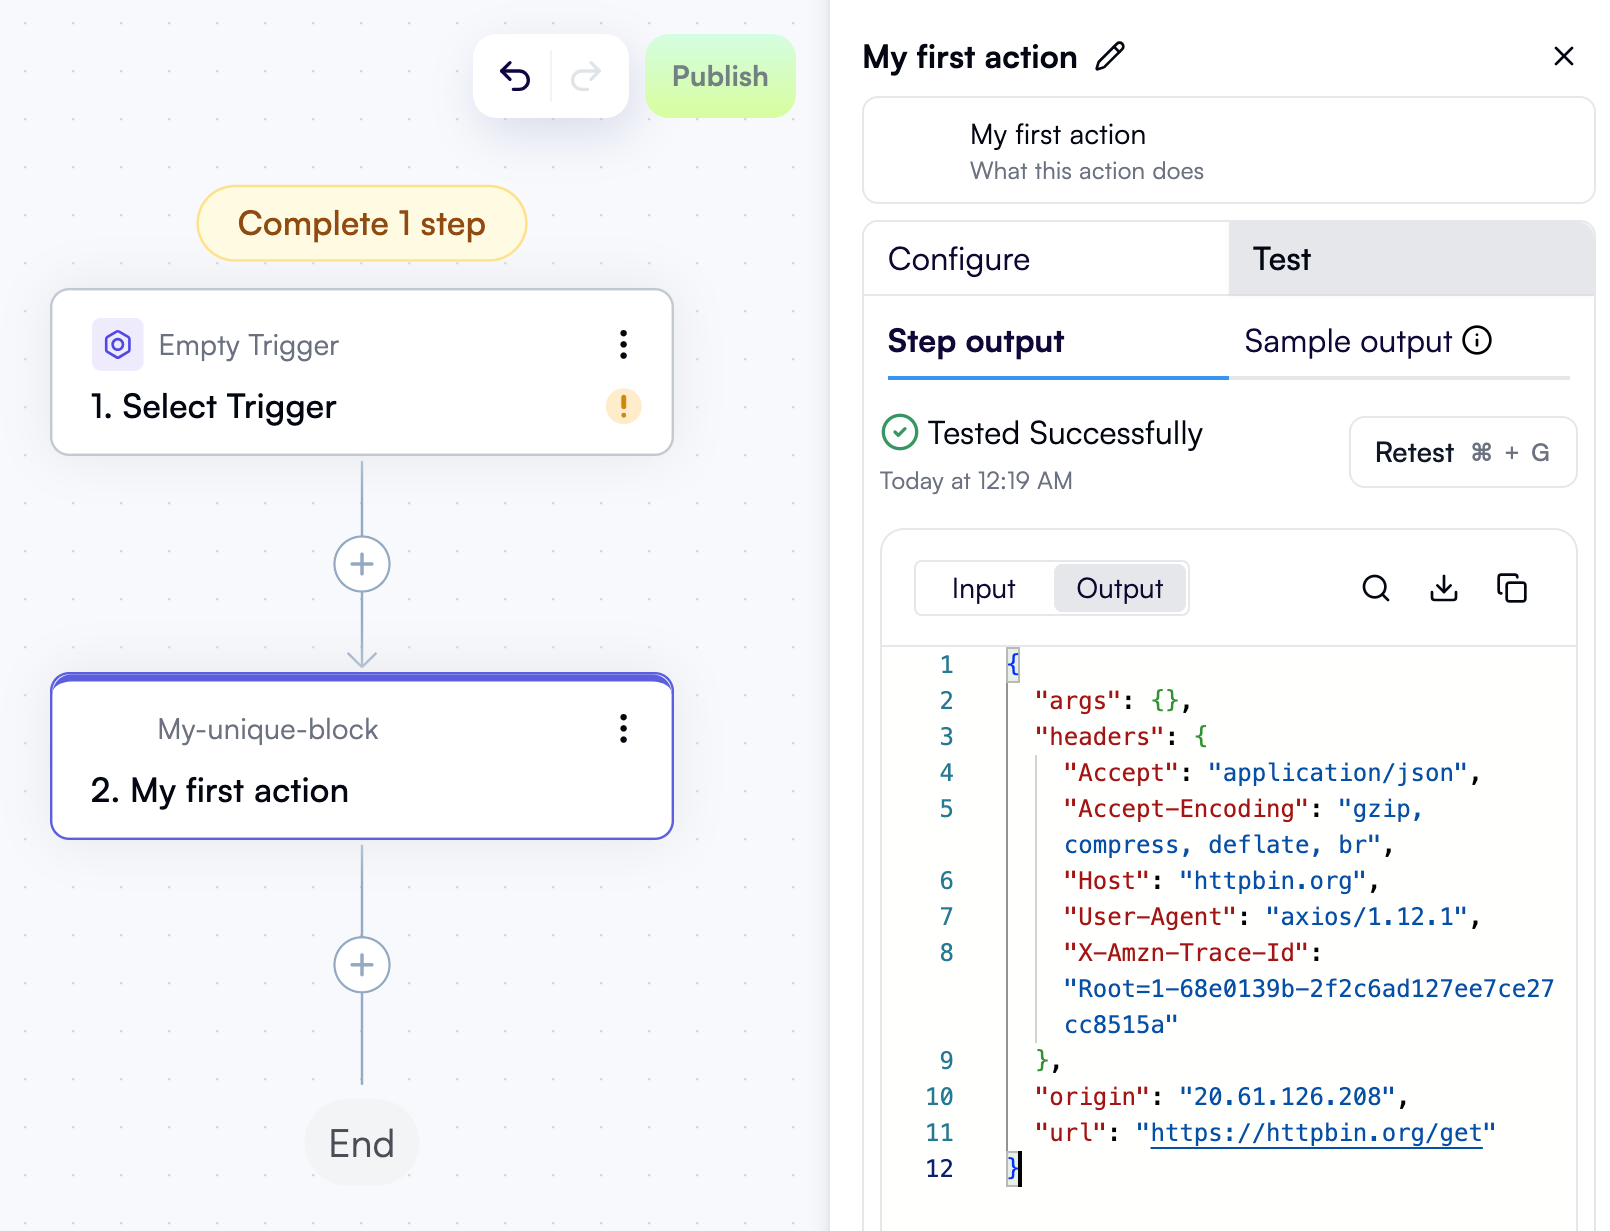
run()function uses thehttpClienthelper provided by OpenOps to make a GET request to httpbin.org. - The
run()function returns the body of the response to the GET request, and this is what the action provides as its final output.
Reference the action in the block definition
To make the action discoverable by OpenOps, import it into the block definition file atsrc/index.ts and add it to the actions array in the definition:
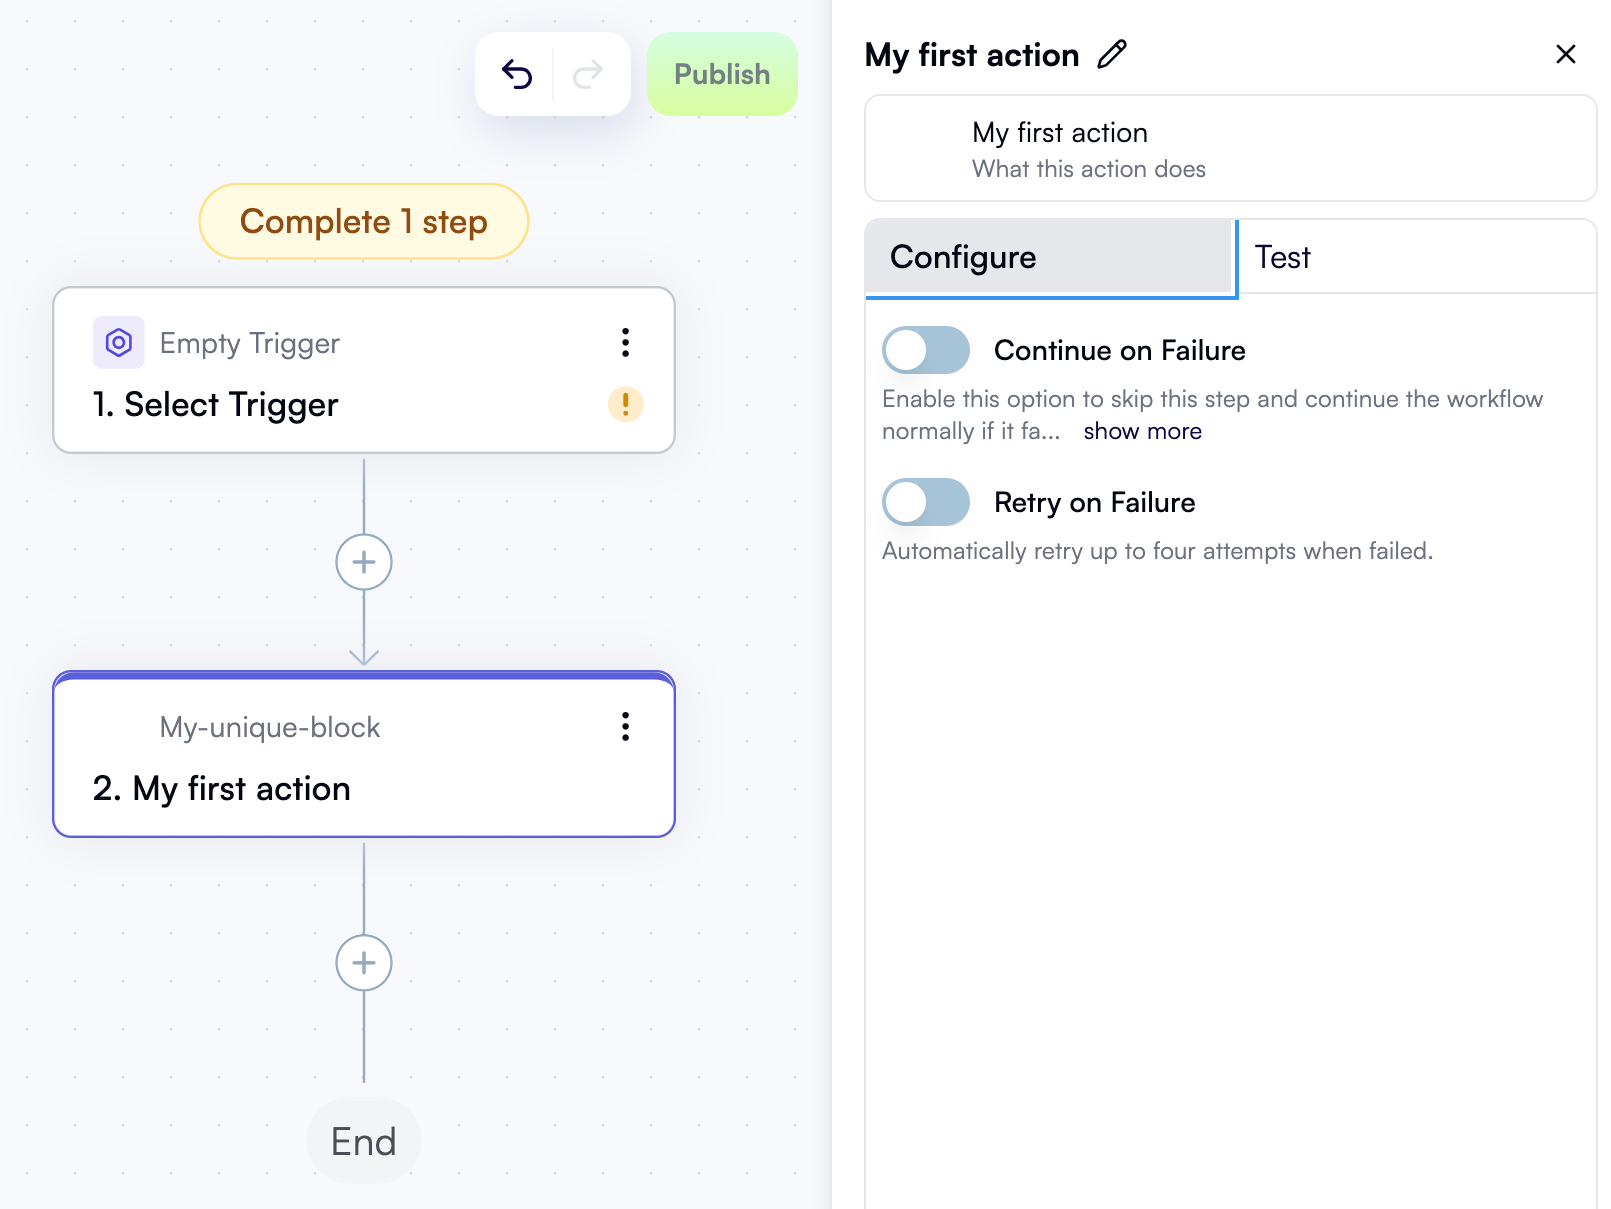
See your action in the OpenOps UI
Once you reference an action from your block definition and the runningnpm start process rebuilds OpenOps, you should see your action in the OpenOps UI for the first time: